Getting started#
0. Setup#
Requirements#
Python 3.7+
detection_datasets is upon the great work of:
- Pandas for manipulating data.
- Hugging Face Datasets to store and load datasets from the Hub.
Installation#
Import#
1. Read#
From local filesystem#
config = {
    'dataset_format': 'coco',                   # the format of the dataset on disk
    'path': 'path/do/data/on/disk',             # where the dataset is located
    'splits': {                                 # how to read the files
        'train': ('train.json', 'train'),       # name of the split (annotation file, images directory)
        'test': ('test.json', 'test'),
    },
}

dd = DetectionDataset()
dd.from_disk(**config)

# note that you can use method cascading as well:
# dd = DetectionDataset().from_disk(**config)
From the Hugging Face Hub#
The detection_dataset library works alongside the Detection dataset organisation on the Hugging Face Hub, where some detection datasets have been uploaded in the format expected by the library, and are ready to use.
- COCO
- more to come
The list of datasets available from the Hub is given by:
# Search in the "detection-datasets" repository on the Hub.
DetectionDataset().available_in_hub()

# Search in another repository on the Hub.
DetectionDataset().available_in_hub(repo_name=MY_REPO_OR_ORGANISATION)
2. Transform#
The supported transformations are:
# Select a subset of images, perserving the splits and their proportions
dd.select(n_images=1000)

# Shuffle the dataset, perserving the splits and their proportions
dd.shuffle(seed=42)

# Create new train-val-test splits, overwritting the splits from the original dataset
dd.split(splits=[0.8, 0.1, 0.1])

# Map existing categories to new categories.
# The annotations with a category absent from the mapping are dropped.
dd.map_categories(mapping={'existing_category': 'new_category'})
These transformations can be chained; for example here we select a subset of 10.000 images and create new train-val-test splits:
dd = DetectionDataset()\
    .from_hub(name='fashionpedia')\
    .select(n_images=10000)\
    .split(splits=[0.8, 0.1, 0.1])
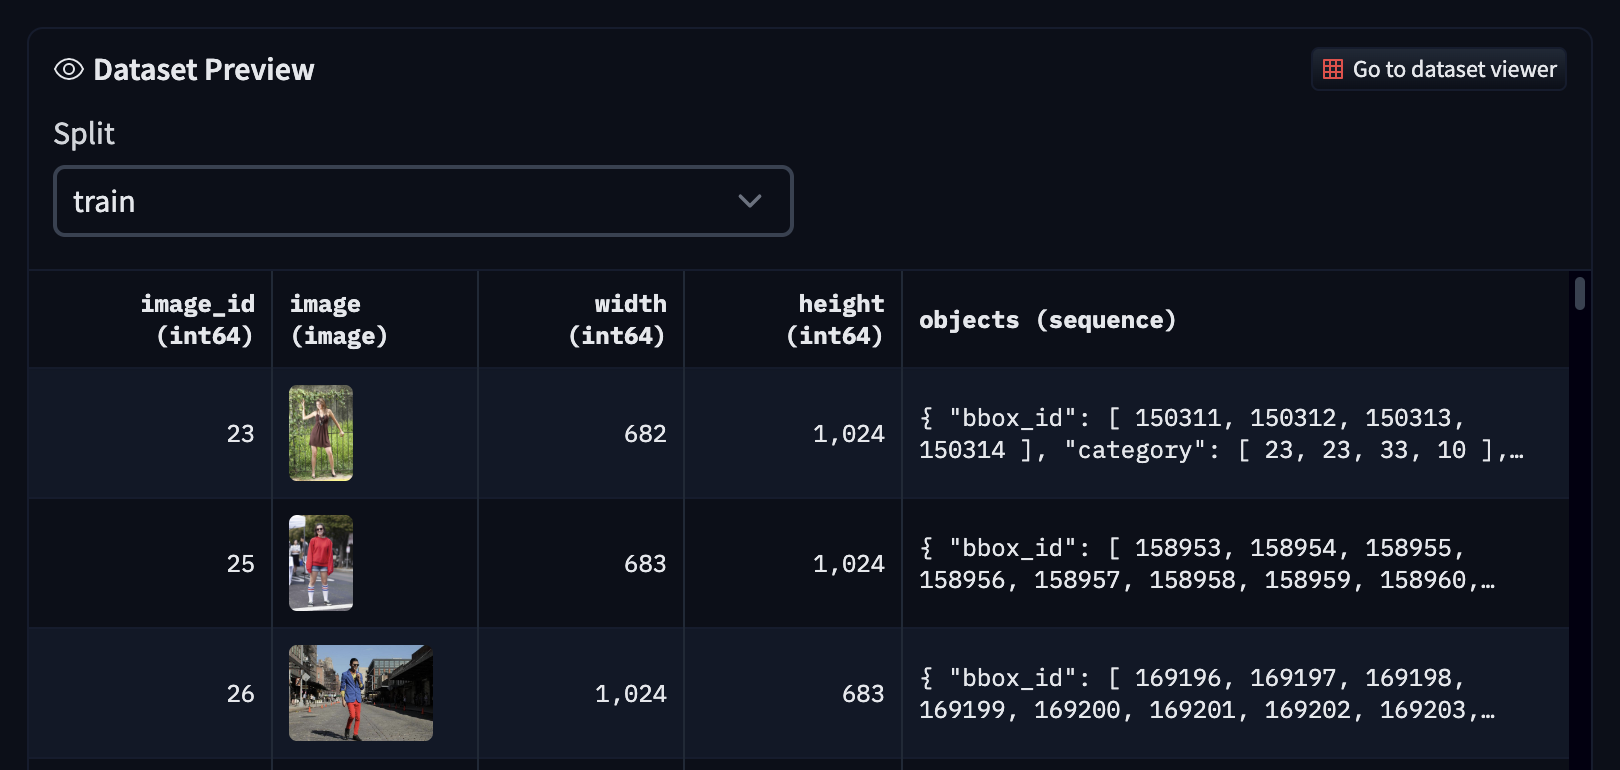
3. Visualize#
The DetectionDataset objects contains several properties to analyze your data:
dd.data                     # This is equivlent to calling `dd.get_data('image')`,
                            # and returns a DataFrame with 1 row per image

dd.get_data('bbox')         # Returns a DataFrame with 1 row per annotation

dd.n_images                 # Number of images

dd.n_bbox                   # Number of annotations

dd.splits                   # List of split names

dd.split_proportions        # DataFrame with the % of iamges in each split

dd.categories               # DataFrame with the categories and thei ids

dd.category_names           # List of categories

dd.n_categories             # Number of categories
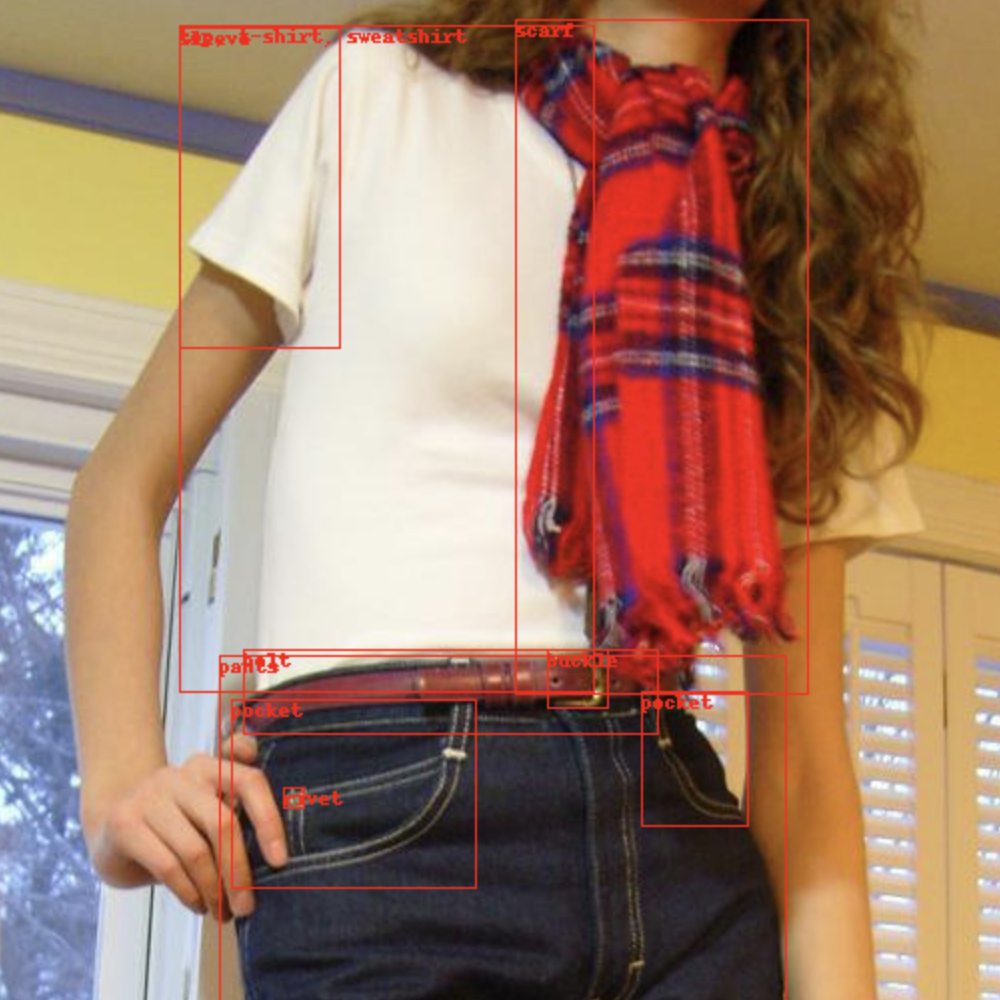
You can also visualize a image with its annotations in a notebook:
dd.show()                   # Shows a random image from the dataset
dd.show(image_id=42)        # Shows the select image based on image_id
4. Write#
To local filesystem#
Once the dataset is ready, you can write it to the local filesystem in a given format:
Currently supported format for writing datasets are:
- YOLO
- MMDET
- more to come
To the Hugging Face Hub#
The dataset can also be easily uploaded to the Hugging Face Hub, for reuse later on or in a different environment:
The dataset viewer on the Hub will work out of the box, and we encourage you to update the README in your new repo to make it easier for the comminuty to use the dataset.